UniFi NordVPN Wireguard Setup
How to connect your Ubiquiti UniFi router to NordVPN using the built-in Wireguard VPN Router Client setup. Here are two methods for getting your NordVPN connected to your UniFi router.…
How to connect a Ubiquiti UniFi router to NordVPN using the built-in WireGuard VPN client, with a fallback method for when the usual approach won't cooperate.
There are two ways to get NordVPN running as a VPN client on a UniFi router. Try the first; if it doesn't work for you, the second gets the same values out by hand.
Method 1 — WireGuard client
Use a WireGuard client to extract the required information. LazyAdmin's guide is well written and walks through the whole thing, so there is no point repeating it here.
Method 2 — the workarounds
If you can't get method 1 working, the steps below pull your private key from the NordVPN API and read the server public keys straight out of the desktop app's own data files.
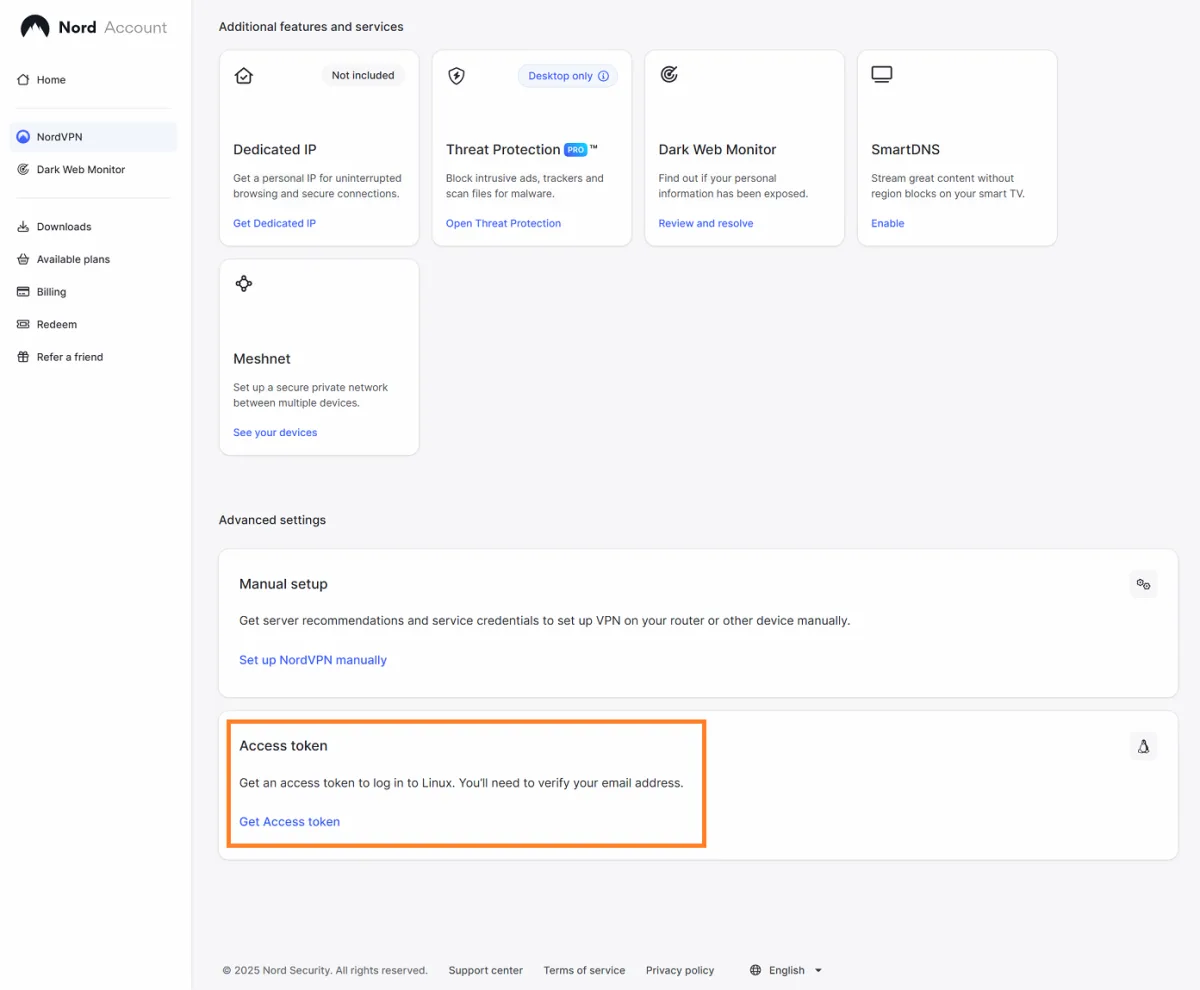
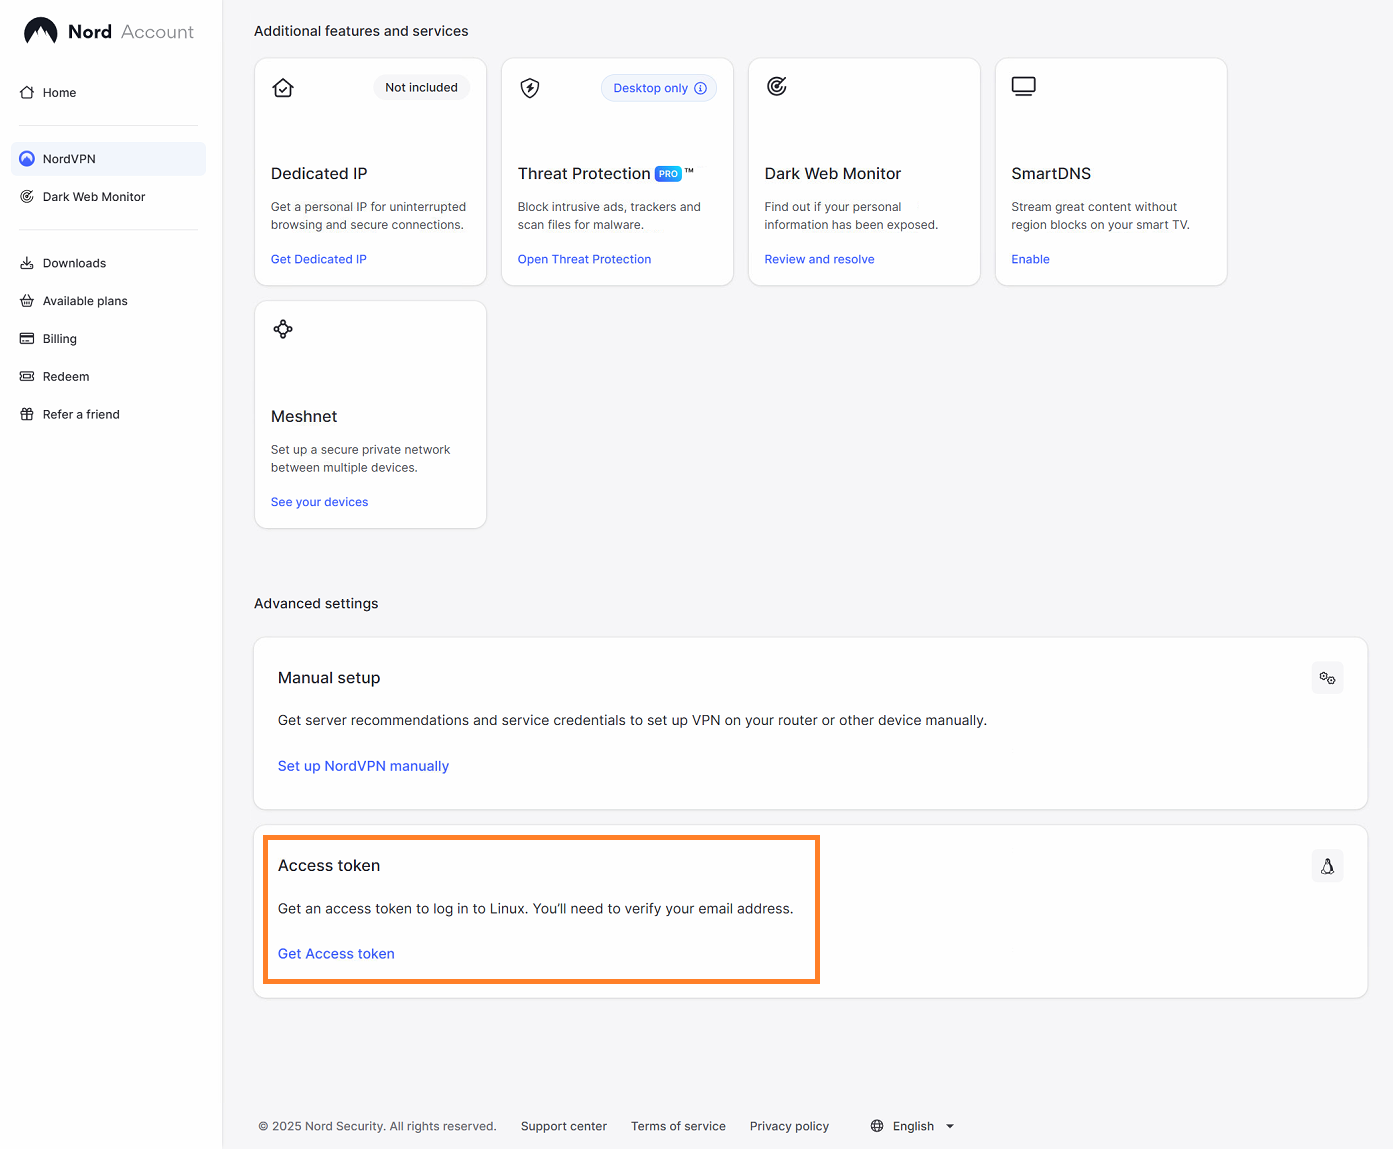
Get an access token from your NordVPN account
Log in to your NordVPN web account at my.nordaccount.com. In the NordVPN menu on the left, scroll down to the access token section — you will need to validate your email address to continue.
When it asks how long the token should stay valid, choose Indefinitely. You can always revoke it later if you need to.
Convert the access token into a WireGuard private key
Use whichever of these suits the machine in front of you.
Windows PowerShell — paste each line and press enter
# 1. Replace the placeholder with your actual access token

$accessToken = "ACCESS-TOKEN-GOES-HERE"

$credentials = "token:$accessToken"
$encodedCredentials = [System.Convert]::ToBase64String([System.Text.Encoding]::UTF8.GetBytes($credentials))
$headers = @{ "Authorization" = "Basic $encodedCredentials" }
$response = Invoke-RestMethod -Uri "https://api.nordvpn.com/v1/users/services/credentials" -Headers $headers
$response.nordlynx_private_key
Linux terminal
#Make sure you have 'curl' and 'jq' installed or install them using : sudo apt install curl jq

curl -s -u token:ACCESS-TOKEN-GOES-HERE https://api.nordvpn.com/v1/users/services/credentials | jq -r .nordlynx_private_key
Copy the resulting WireGuard private key and keep it somewhere safe.
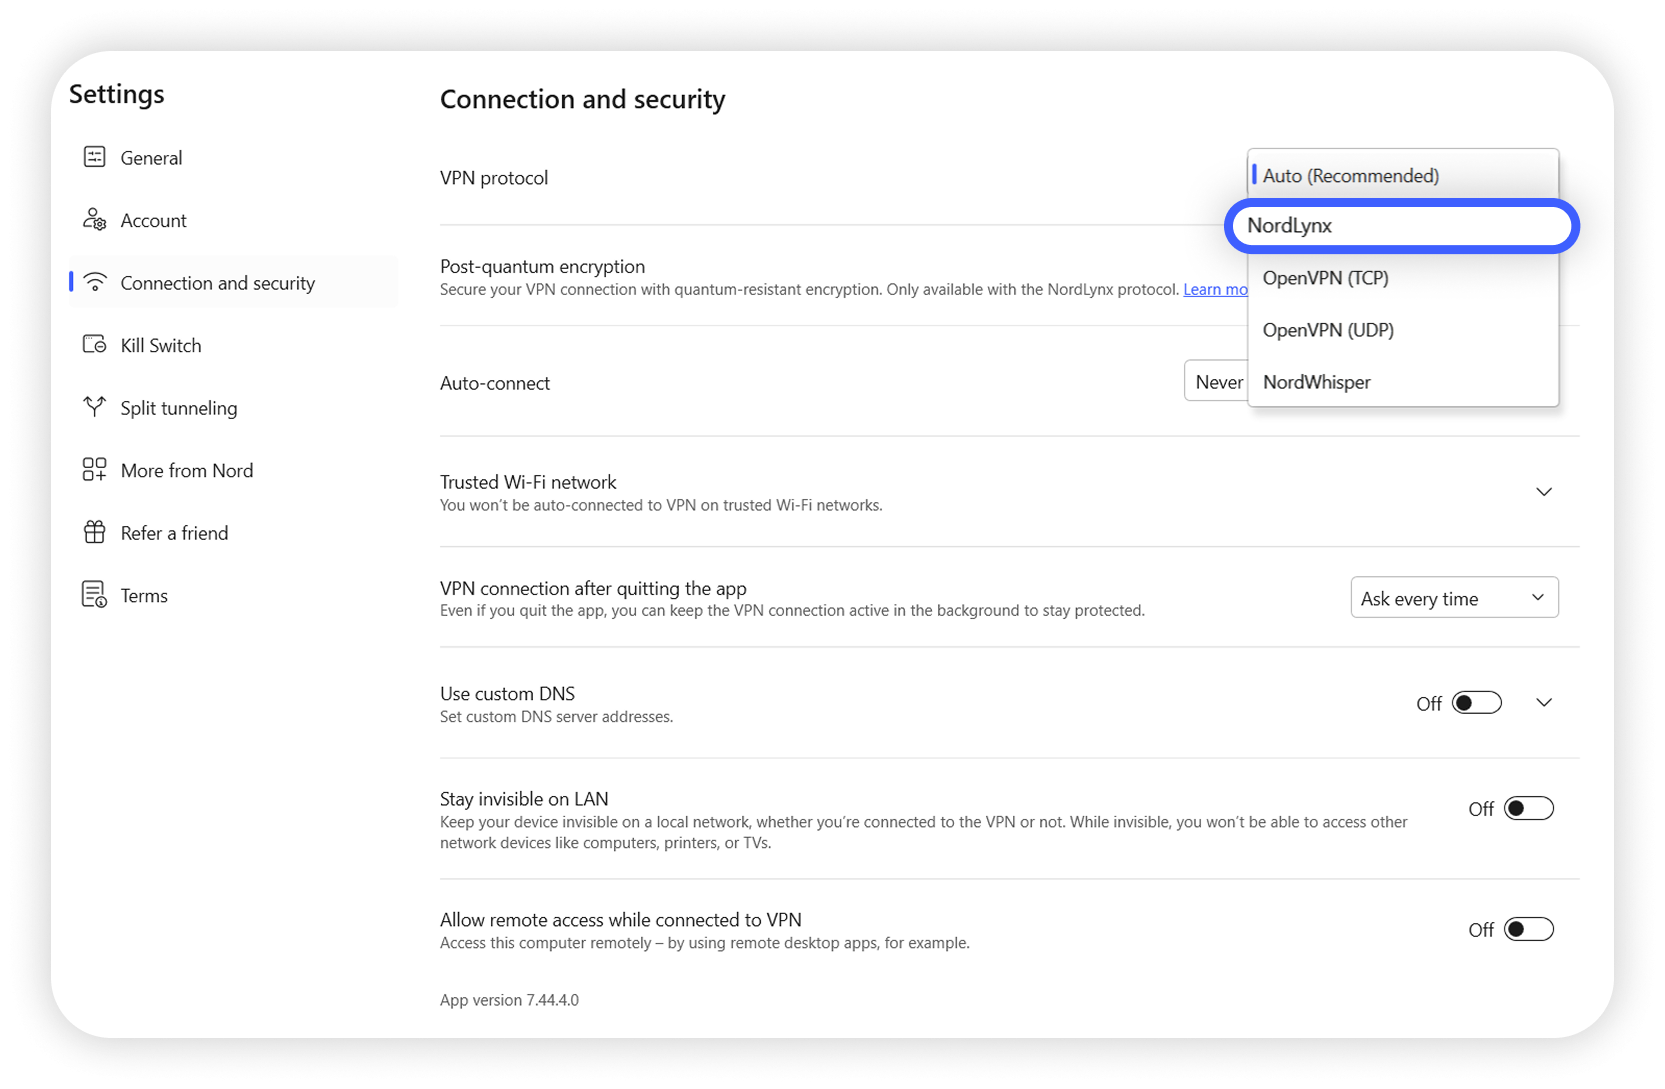
Set the desktop app to NordLynx and connect
Open the Windows NordVPN app, go to Connection and Security, and set the VPN protocol to NordLynx rather than Auto.
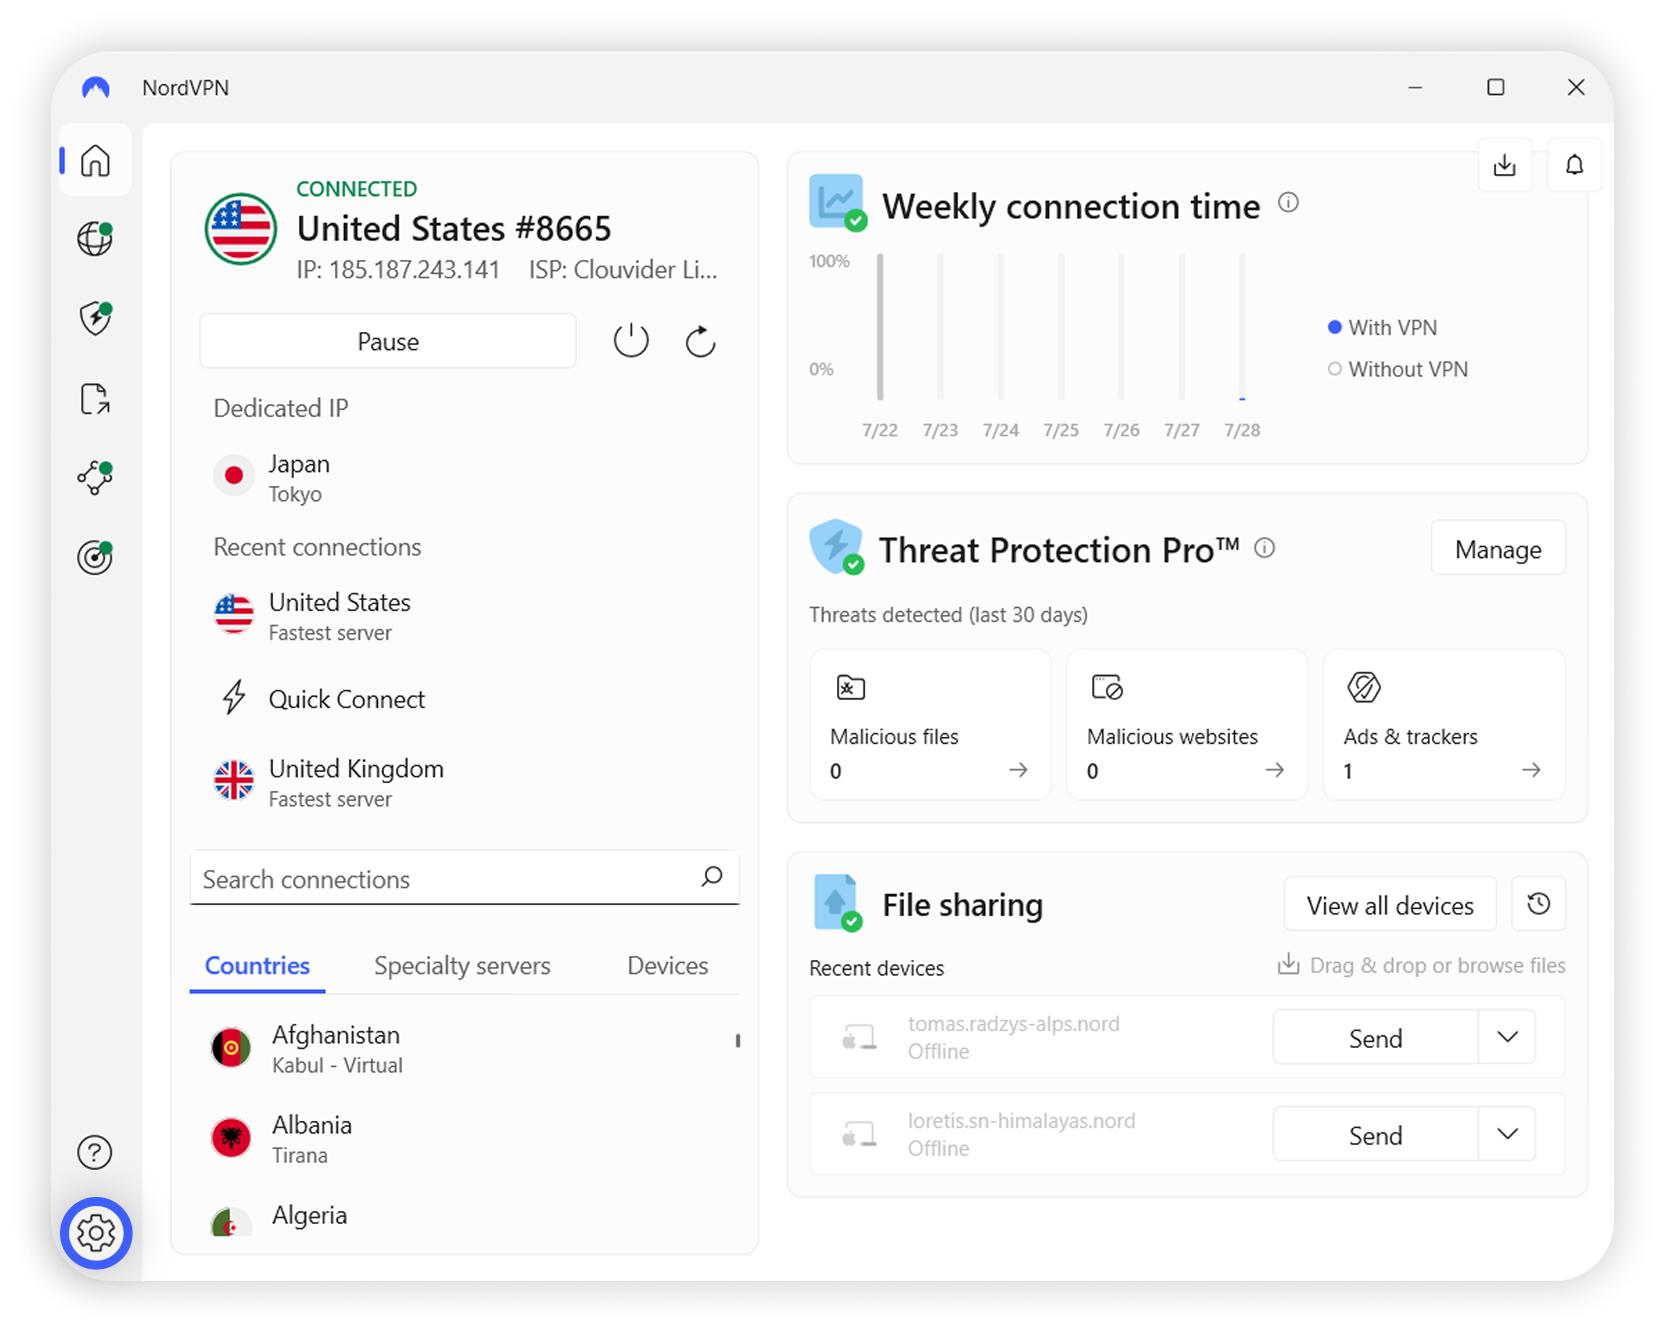
Then connect to the country you want using the Home VPN connection options.
Find the server IP and public key
Open Windows File Explorer and paste %localappdata% into the address bar, or use Windows + R and paste it there. Then find the NordVPN folder.
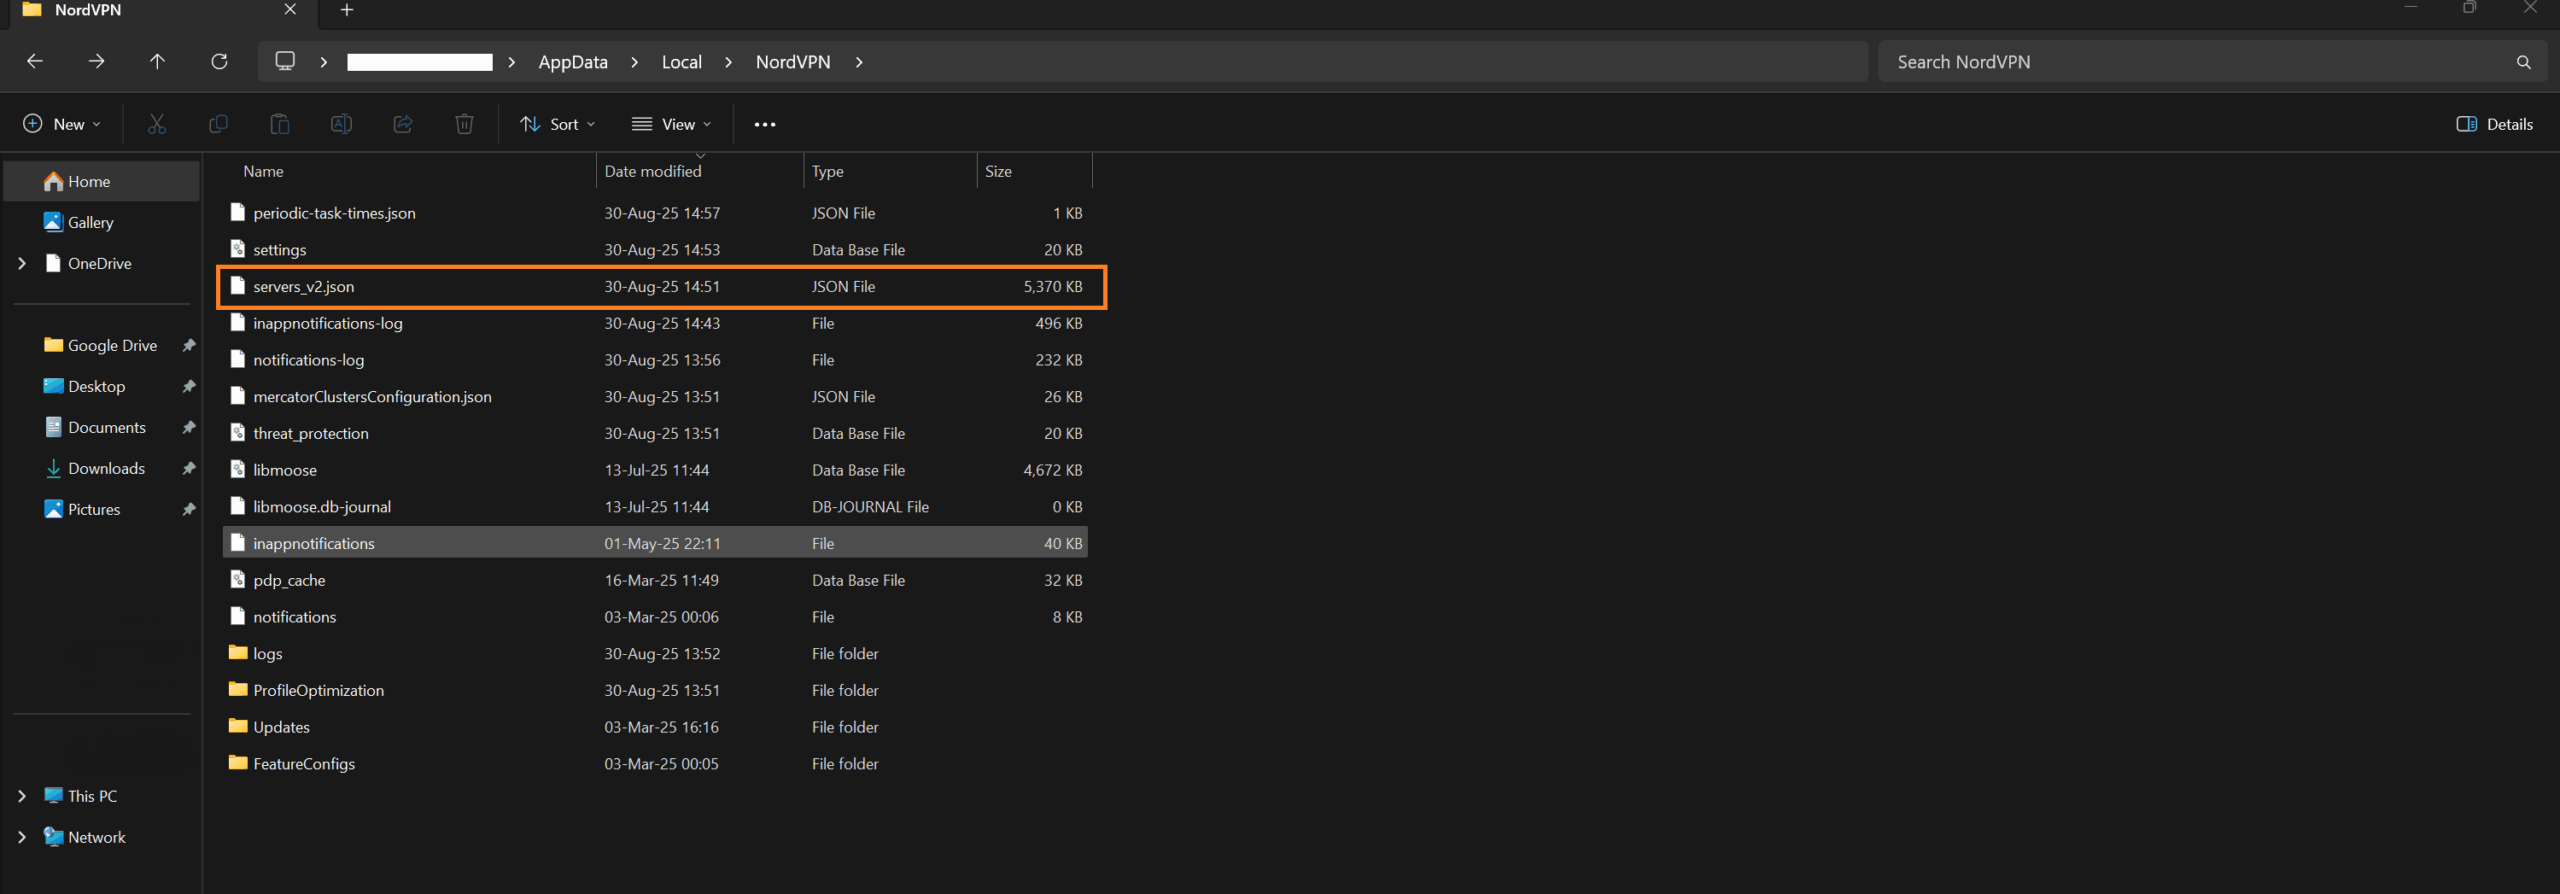
Look for either a .zip file or a .json file, likely named server_v2.json. Inside is a list of servers with their matching IP addresses and server keys.
Example excerpt from server_v2.json
{"Id":930695,"Name":"Austria #86","Station":"185.216.34.10","HostName":"at86.nordvpn.com","Load":19,"Status":"online","Technologies":[{"Id":1,"Status":"online","Metadata":[]},{"Id":3,"Status":"online","Metadata":[]},{"Id":5,"Status":"online","Metadata":[]},{"Id":21,"Status":"online","Metadata":[]},{"Id":23,"Status":"online","Metadata":[]},{"Id":35,"Status":"online","Metadata":[{"Name":"public_key","Value":"F6b2ac9H7hEvt03EonY1aV5FzNAabEmURDTB8wIIPXc="}]},{"Id":51,"Status":"online","Metadata":[{"Name":"port","Value":"8443"}]}],"Specifications":[{"Id":8,"Identifier":"version","Title":"Version","Values":[{"Id":257,"value":"2.1.0"}]}],"group_ids":[11,15,19],"location_ids":[205]},{"Id":930743,"Name":"Switzerland #217","Station":"185.156.175.12","HostName":"ch217.nordvpn.com","Load":29,"Status":"online","Technologies":[{"Id":1,"Status":"online","Metadata":[]},{"Id":3,"Status":"online","Metadata":[]},{"Id":5,"Status":"online","Metadata":[]},{"Id":21,"Status":"online","Metadata":[]},{"Id":23,"Status":"online","Metadata":[]},{"Id":35,"Status":"online","Metadata":[{"Name":"public_key","Value":"SqAWBSVdnUJ859Bz2Nyt82rlSebMwPgrmQxIb1DzyF8="}]},{"Id":51,"Status":"online","Metadata":[{"Name":"port","Value":"8443"}]}],"Specifications":[{"Id":8,"Identifier":"version","Title":"Version","Values":[{"Id":257,"value":"2.1.0"}]}],"group_ids":[11,15,19],"location_ids":[107]},That excerpt contains two servers:
- 1: Austria #86 IP: 185.216.34.10 Server public key: F6b2ac9H7hEvt03EonY1aV5FzNAabEmURDTB8wIIPXc=
- 2: Switzerland #217 IP: 185.156.175.12 Server public key: SqAWBSVdnUJ859Bz2Nyt82rlSebMwPgrmQxIb1DzyF8=
Create the VPN client in UniFi
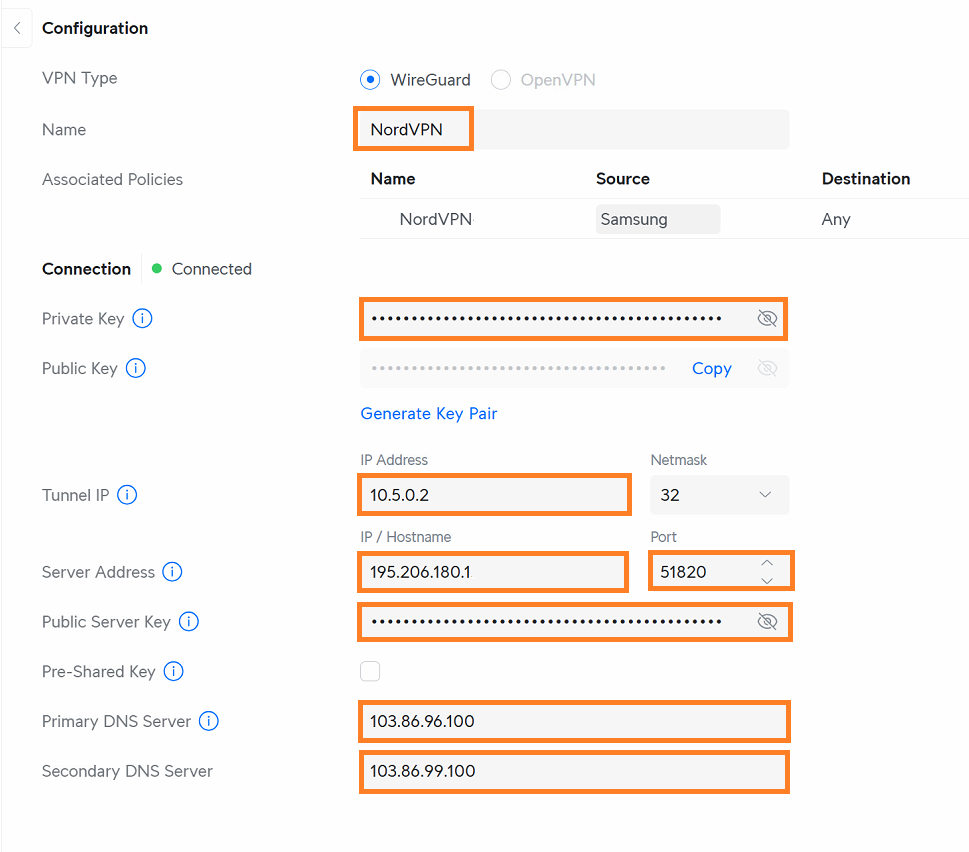
Open your UniFi interface in a browser on a PC and go to Settings / VPN / VPN Client, then choose Create New.
| Field | What to enter |
|---|---|
| Name | Anything you like. |
| Private key | The WireGuard private key you generated in step 2. |
| Tunnel IP | 10.5.0.2 with netmask 32 — this is the standard for any of the servers. |
| Server address | The IP of the server you chose. Make sure the port is 51820, not 51821. |
| Public server key | The public key matching the server you selected. |
| Primary DNS | 103.86.96.100 |
| Secondary DNS | 103.86.99.100 |
Then create the route
When you finish creating the client, a popup appears offering to create a route — a policy-based route in the policy engine.
- Name: anything you like.
- Interface / VPN tunnel: the VPN client you just created.
- Kill switch: tick or untick. If the VPN disconnects, this decides whether data keeps flowing for your selected devices.
- Source: choose Device or Network, then pick the device — a TV or PC, for example — or the whole network.
- Destination: Any.
- Click Add or Save to finish.
Want this set up properly across a site?
Policy-based routing, kill switches and per-device tunnels are all part of the network work we do on UniFi estates.