How To Live Monitor UniFi SuperLink Environmental Temperature on External Website
How to Export UniFi Protect Environmental Sensor Data for Additional Processing or Website Visibility.Common solutions for this require running a local Raspberry PI or ESP32 or Home Assistant but this…
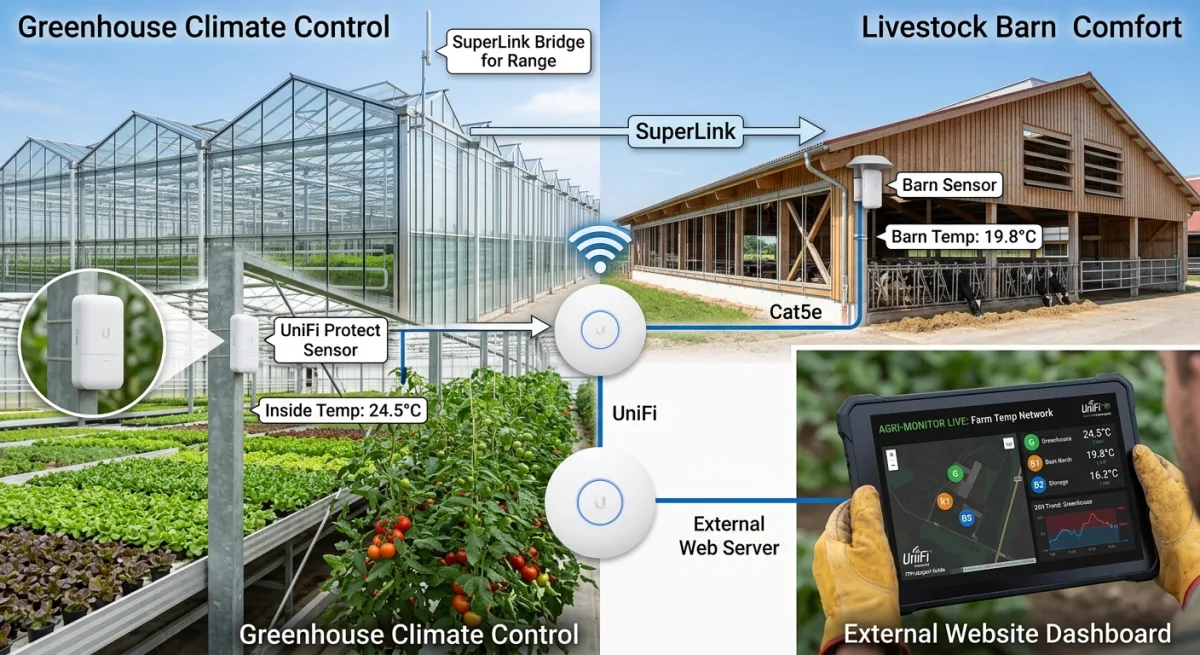
UniFi Protect's USL-Environmental sensors record temperature, humidity and light beautifully — but the history stays locked inside the console. This guide gets that telemetry out to your own web server, in real time, even when the site sits behind CGNAT.
Most write-ups solve this with extra hardware on site: a Raspberry Pi, an ESP32, or a Home Assistant box polling the console locally. That works, but it is another device to power, patch and worry about. This method needs no additional gear at the site at all.
The awkward part is the network. If your UniFi console sits behind a locked-down firewall, Starlink, a mobile router, or any ISP using Carrier-Grade NAT, you cannot simply forward a port and poll the console from outside — inbound traffic is effectively blocked. So we invert the connection: the console dials out to a cloud server, and the polling happens from inside that tunnel.
How the pipeline fits together
Reverse WireGuard tunnel
The UniFi console connects out to a cloud VPS, so nothing has to be opened inbound on the site's connection.
Python poller
A small script on the VPS logs into the local Protect API through the tunnel and reads each sensor's stats.
PHP webhook
Readings are posted to your web server, which appends them to a CSV — ready for a database, a chart, or a live page.
Prerequisites
- A UniFi OS console or Protect NVR, running a release that offers Settings > VPN > VPN Client with WireGuard support.
- One or more USL-Environmental sensors, adopted and reporting in Protect.
- A cheap cloud VPS (IONOS, DigitalOcean, Linode and similar are all fine) running Debian or equivalent, with root access.
- A basic web server capable of running PHP. You can add your own SQL database and front-end later.
Step 1: Configure the VPS as the WireGuard server
Because inbound traffic may be blocked at the site, we reverse the usual roles: the VPS acts as the server waiting for a connection, and the UniFi console connects out to it.
- SSH into your Debian VPS and elevate to root:
sudo su - Enable IPv4 forwarding so the VPS can route the tunnel traffic:
echo "net.ipv4.ip_forward = 1" > /etc/sysctl.d/99-wireguard.conf sysctl -p /etc/sysctl.d/99-wireguard.conf - Install WireGuard and generate the cryptographic keys:
sudo apt update && sudo apt install wireguard -y cd /etc/wireguard/ umask 077 wg genkey | tee server_private.key | wg pubkey > server_public.key wg genkey | tee unifi_private.key | wg pubkey > unifi_public.key - Print your keys to the screen and copy them somewhere safe:
cat server_private.key && cat server_public.key && cat unifi_private.key && cat unifi_public.key - Create the server configuration file:
nano /etc/wireguard/wg0.conf - Paste the following, replacing the bracketed items with your keys:
[Interface] Address = 10.0.0.1/24 ListenPort = 51820 PrivateKey = <SERVER_PRIVATE_KEY> [Peer] PublicKey = <UNIFI_PUBLIC_KEY> AllowedIPs = 10.0.0.2/32, 192.168.130.0/24 # Note: Replace 192.168.130.0/24 with your actual local UniFi subnet - Start the tunnel and set it to run on boot:
wg-quick up wg0
systemctl enable wg-quick@wg0
Step 2: Connect the UniFi console
Now we create a configuration file to upload to the console so it can dial out to the VPS.
- On your local computer, create a text file named
unifi-vps-tunnel.conf. - Paste the following template, filling in your keys and your VPS's public IP address:
[Interface]
PrivateKey = <UNIFI_PRIVATE_KEY>
Address = 10.0.0.2/24
DNS = 8.8.8.8

[Peer]
PublicKey = <SERVER_PUBLIC_KEY>
Endpoint = <VPS_PUBLIC_IP>:51820
AllowedIPs = 10.0.0.1/32
PersistentKeepalive = 25
PersistentKeepalive = 25is the magic setting: it forces UniFi to constantly ping the VPS, keeping the connection open permanently. TheDNS = 8.8.8.8line is required to bypass a validation bug in the UniFi UI. - Log into your UniFi Network application.
- Go to Settings > VPN > VPN Client.
- Click Create New, select WireGuard, name it, and upload the
unifi-vps-tunnel.conffile. Leave all routing wizards Off, then click Apply.
Step 3: Defeat the UniFi firewall
By default, UniFi treats this VPN as an external internet connection and blocks the VPS from talking to your local devices. We must create an exception.
- In the UniFi Network application, go to Settings > Security > Traffic Rules (or Firewall Rules). On newer releases using the zone-based firewall, the equivalent is a policy allowing the VPN zone to reach the internal zone.
- Create a new rule with the following settings:
- Action: Allow
- Source Zone: External → IP →
10.0.0.1(your VPS virtual IP) - Destination Zone: Internal → IP →
192.168.123.52(your NVR's local IP)
- Save the rule. To test it, SSH into your VPS and run
ping 192.168.123.52. It should reply successfully.
Step 4: Create a local UniFi API account
The Python script needs credentials to query the Protect API. Your UI.com cloud account will not work here — the login has to be local.
- Log into your UniFi OS console via its local IP.
- Go to Admins & Users (do not click into the Protect or Network apps).
- Click Add Admin and tick Restrict to local access only.
- Create a username and password.
- Set the Protect app permission to View Only and save.
Step 5: The PHP webhook receiver
This script catches the data sent by the Python worker and appends it to a CSV file. Create a file named webhook.php on your web server:
<?php
$jsonPayload = file_get_contents('php://input');
$data = json_decode($jsonPayload, true);

if (!$data || !is_array($data)) {
    http_response_code(400);
    exit("Invalid payload.");
}

$csvFile = 'sensor_data.csv';
$isNewFile = !file_exists($csvFile);
$fileHandle = fopen($csvFile, 'a');

if ($isNewFile) {
    fputcsv($fileHandle, ['Timestamp', 'Site', 'Device Name', 'Temperature (C)', 'Humidity (%)', 'Light (Lux)']);
}

$timestamp = date('Y-m-d H:i:s');

foreach ($data as $sensor) {
    fputcsv($fileHandle, [
        $timestamp,
        $sensor['site'] ?? 'Unknown',
        $sensor['device_name'] ?? 'Unknown',
        $sensor['temperature_c'] ?? 'N/A',
        $sensor['humidity_pct'] ?? 'N/A',
        $sensor['light_lux'] ?? 'N/A'
    ]);
}

fclose($fileHandle);
http_response_code(200);
echo "Data logged.";
?>
Make sure your web server has write permissions (e.g. 755 or 775) in the directory where this script lives, so it can create the CSV file. Later on you can recode this to write straight into a database.
Step 6: The Python extraction script
Finally, we put the Python worker on the Debian VPS.
- Install the requests library:
sudo apt install python3-requests -y - Create the script:
nano unifi_temp.py - Paste the following code, replacing the NVR IPs, credentials and webhook URL with your own:
import requests
import urllib3

urllib3.disable_warnings(urllib3.exceptions.InsecureRequestWarning)

WEBHOOK_URL = "https://yourwebsite.com/webhook.php"

SITES = [
    {
        "site_name": "Main Site",
        "nvr_ip": "192.168.130.82",
        "username": "your_local_username",
        "password": "your_local_password"
    }
]

def fetch_and_push_data():
    all_sensor_data = []

    for site in SITES:
        session = requests.Session()
        login_url = f"https://{site['nvr_ip']}/api/auth/login"
        sensors_url = f"https://{site['nvr_ip']}/proxy/protect/api/sensors"

        try:
            session.post(login_url, json={"username": site['username'], "password": site['password']}, verify=False, timeout=10)
            sensor_response = session.get(sensors_url, verify=False, timeout=10)
            sensors_data = sensor_response.json()

            for sensor in sensors_data:
                if 'USL-Environmental' in sensor.get('type', ''):
                    all_sensor_data.append({
                        "site": site['site_name'],
                        "device_name": sensor.get('name', 'Unknown'),
                        "temperature_c": sensor['stats'].get('temperature', {}).get('value'),
                        "humidity_pct": sensor['stats'].get('humidity', {}).get('value'),
                        "light_lux": sensor['stats'].get('light', {}).get('value')
                    })

        except Exception as e:
            print(f"Error at {site['site_name']}: {e}")

    if all_sensor_data:
        requests.post(WEBHOOK_URL, json=all_sensor_data, timeout=10)

if __name__ == "__main__":
    fetch_and_push_data()
Step 7: Automate the telemetry
To pull data automatically every five minutes, add the script to your Debian VPS crontab.
- Run
crontab -e. - Add this line to the bottom of the file, adjusting the paths if necessary:
*/5 * * * * /usr/bin/python3 /root/unifi_temp.py > /dev/null 2>&1
That is the pipeline complete. You now have a resilient, real-time feed extracting UniFi Protect telemetry through a CGNAT connection.
Check it is actually working
Four quick tests, in order — each one narrows down where a failure sits.
- Is the tunnel up? On the VPS, run
wg show. A recent handshake time and non-zero transfer figures mean the console has dialled out successfully. No handshake almost always means UDP 51820 is still blocked. - Can the VPS reach the NVR?
pingthe NVR's local IP from the VPS. A reply means the tunnel routing and the UniFi traffic rule are both correct. - Does the script run? Execute it by hand once with
python3 /root/unifi_temp.pybefore trusting cron. It should print nothing at all — any error text tells you exactly which stage failed. - Is data landing? Check that
sensor_data.csvhas appeared on the web server. A header row with no data rows underneath means the login worked but theUSL-Environmentaltype filter matched nothing.
Note that the cron line above sends all output to /dev/null, so a failing script fails silently. While you are testing, point it at a log file instead and read it after the first few runs.
Hardening and housekeeping
The pipeline works as written, but it is deliberately minimal. Before you leave it running permanently, deal with these.
Running more than one site
The same tunnel handles multiple consoles. Four things need to change.
- Give each console its own tunnel address. The second site uses
Address = 10.0.0.3/24, the third10.0.0.4/24, and so on. - Generate a fresh key pair for each additional console and give it its own
[Peer]block inwg0.conf. WireGuard identifies peers by public key, so two consoles sharing one key will fight over the same tunnel. - Add each new peer address and each new LAN subnet to the allowed ranges on the VPS, then restart WireGuard:
AllowedIPs = 10.0.0.2/32, 10.0.0.3/32, 192.168.123.0/24, 192.168.156.0/24sudo wg-quick down wg0 && sudo wg-quick up wg0 - Repeat the Step 3 traffic rule on the new console, and add another entry to the
SITESlist in the Python script. Thesite_nameyou give it is what lands in the CSV's Site column.
If you are building out more of the Ubiquiti stack, there is more in our Ubiquiti Universe.
Want this built, monitored and supported for you?
We design and support UniFi networks across London, Kent and Sussex, and remotely worldwide.