How to Code Sign FastSSL/Sectigo/DigiCert using YubiKey 5C NFC FIPS v5.4 HSM
This guide outlines the professional workflow for setting up an FastSSL/Sectigo/DigiCert Extended Validation (EV) or Standard Code Signing (CS) certificate on a YubiKey 5 FIPS Firmware V5.4.3+ using ECCP384 or…
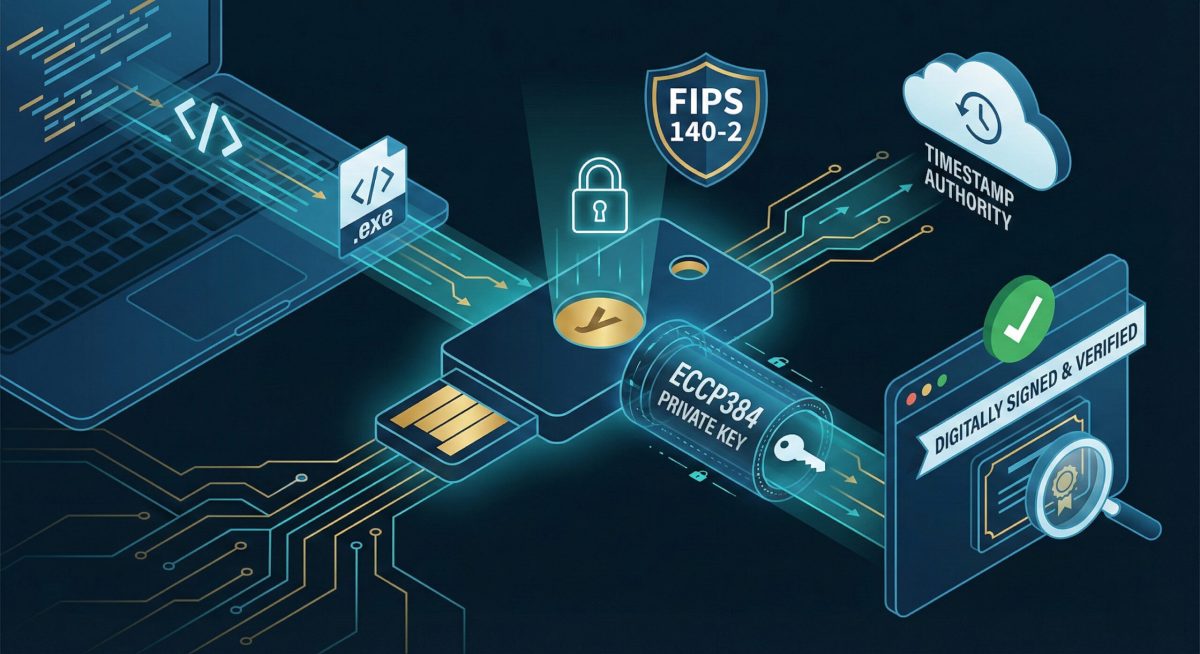
This guide outlines the professional workflow for setting up a FastSSL/Sectigo/DigiCert Extended Validation (EV) or Standard Code Signing (CS) certificate on a YubiKey 5 FIPS Firmware V5.4.3+ using ECCP384, or with Firmware V5.7+ using RSA4096.
We have been told it is only possible to code sign using RSA4096 on an approved SafeNet device, like the "Thales eIDAS USB token Gemalto SafeNet eToken 5110 CC (940)", but it turns out you can do it on the YubiKey and it can even be ECCP384 instead of RSA4096. With a significant lack of instructions online, we have now published this how-to guide for anyone else hoping to do the same. This method ensures compliance with CA/Browser Forum requirements that private keys remain on FIPS-validated hardware.
ECCP384 is used throughout specifically to ensure backwards compatibility with all recent YubiKey 5 FIPS HSMs, but note that if your device is Firmware V5.7+ it should support both ECCP384 and RSA4096.
1. Prerequisites
Ensure the following tools are installed on your Windows environment:
2. Generate the Key and CSR
For code signing, Slot 9a (Authentication) is the ONLY slot this will work in. Slot 9a allows for PIN Caching, meaning you only enter your PIN once per session rather than for every single file — a necessity for batch signing. We tried with 9c and it didn't work due to no PIN Caching.
Step A: Generate the Private Key
Generate the private key directly on the device and export the public counterpart.
PowerShell/CMD — if you want to replace the "ECCP384" with "RSA4096", you can do this below if using YubiKey 5 FIPS v5.7+
ykman piv keys generate --algorithm ECCP384 --pin-policy ONCE --touch-policy ALWAYS 9a public.pem
TIP: If 'ykman' is not in your local folder you can replace it with this, just make sure you keep the inverted commas " " around the path and .exe:
"C:\Program Files\Yubico\YubiKey Manager\ykman.exe" piv keys etc... etc..Step B: Generate the Certificate Signing Request (CSR)
When creating the CSR, do not use spaces after commas in the subject string, as this can cause validation errors with some CAs.
PowerShell/CMD
# Replace with your actual company details that should be a match you your actual matching details with your certificate provider.
# Note country code for UK is GB and USA is US. Incorrect will cause an error.
ykman piv certificates request --subject "CN=YourCompany,O=YourCompany,L=City,ST=State,C=CountryCode" 9a public.pem csr.csr
Step C: Copy the Certificate Signing Request (CSR) Contents to CRT Generate Website
Open the csr.csr file with a text editor and copy the contents into the website (certificate issue/reissue) to generate the final certificate.
You will need to approve this via two email request forms and then you will get a download link.
Make sure you download all of the FIPS 140-2 Level 2 or Common Criteria EAL4+ and all bundles of CRT, CER, PEM files for safe keeping.
Just make sure you get the 3 main ones, which are the 'Company Certificate', then the 'Intermediate certificate' — as per this example, grab the 'GoGetSSL G4 RSA4096 SHA256 2022 CA-1' (which is ECCP384 compatible anyway) — and the 'root certificate', which is the 'DigiCert Trusted Root G4' certificate in this case. Aim to get the CRT, CER and PEM versions. You will be using the .crt version shortly.
I say make sure you have saved them all because some providers don't allow you to download them again and it's best to keep all of them.
3. (Optional) Generate FIPS Attestation
Likely not needed if the above worked. Only some providers require proof that the key was generated on FIPS-validated hardware. This requires a "bundle" of two files.
- Generate Attestation for Slot 9a:
ykman piv keys attest 9a attestation.crt - Export the YubiKey Intermediate:
ykman piv certificates export f9 intermediate.crt
Note: When enrolling, you may need to paste both files into a single text box. Paste the Attestation content first, followed immediately by the Intermediate content, including all -----BEGIN/END----- headers.
4. Install the Issued Certificate
Once the CA issues your .crt file, import it back to the YubiKey:
PowerShell/CMD
ykman piv certificates import 9a issued_cert.crt
Refining the Windows Store:
- Open
certmgr.mscand remove any old/related certificates in Personal > Certificates. - Eject the YubiKey, wait 10 seconds, and re-insert it. This forces the Minidriver to repopulate the certificate store correctly.
5. Signing Code with Signtool
To sign, you need your certificate's SHA1 Thumbprint. Locate this by running certutil -user -store My.
certutil -user -store MyNote that even if that comes back with 'Private key is NOT exportable', you will see a line that looks like:
Cert Hash(sha1): e1a92d84c7b530f261ad809e36782a16fec6507b
Copy that hash, as that is your Thumbprint. (Please note the above is a random example — use your own.)
The Signing Command
For ECC certificates on FIPS hardware, providing the timestamp and digest algorithm is critical to avoid "SignerSign() failed" errors.
PowerShell/CMD — make sure you insert your 'Thumbprint' from above with no [ ] either side.
signtool.exe sign /sha1 [ADD-YOUR-THUMBPRINT-NO-BRACKETS] /fd SHA256 /tr http://timestamp.digicert.com /td SHA256 /as /ph /v "C:\path\to\your\app.exe"
IMPORTANT: Ensure you touch the YubiKey immediately after entering your PIN when prompted!
6. Troubleshooting Common Errors
| Error Code | Meaning | Solution |
| 0x8010006a | Security Violation | Physically touch the YubiKey sensor after entering the PIN. |
| 0x80090016 | Keyset does not exist | Verify the certificate is visible in certmgr. Try re-inserting the token. |
| Invalid CSR | PEM Boundary Error | Ensure you are pasting the -----BEGIN CERTIFICATE REQUEST----- block, not the Attestation file. |
| Cannot find the original signer | The certificate file is a PKCS#7 chain, not a single certificate | Import only the end-entity certificate — the first -----BEGIN CERTIFICATE----- block on its own. See the renewal notes in Section 7. |
7. Renewing the Certificate
Renewal is not the same as a first issue, and the wrong choice in the reseller's basket will leave you with a certificate you cannot install on your YubiKey. Here is what to get right.
-
Use the original CSR
You need the same
csr.csrfile you generated in Section 2, Step B. The private key it belongs to is still sitting in slot 9a of the YubiKey and cannot be exported, so that CSR is the only thing that ties your renewal to the key you already have. Keep it backed up with your certificate bundle — if it is lost, you have to generate a completely new key pair and CSR. -
Choose "Install on Existing HSM"
During the renewal process you will be offered a certificate collection method. Choose Install on Existing HSM and paste your CSR into the box provided. Do NOT choose Install on Existing Token — that option is for a physical token the provider has already shipped to you, and it will not produce a certificate you can import into the YubiKey. When asked whether the private key was generated by a Common Criteria EAL4+ or FIPS 140-2 Level 2 HSM, answer Yes.
-
Match every company detail exactly
Company name, registered address, email address and telephone number must all match the details held on the original order and in the public records the CA checks against. A single mismatched line — an old office address, a different contact number, a personal email instead of the company one — is enough to stall validation and cost you days. Check the details in the CSR subject match too.
Verifying you have the right CSR
If you have more than one CSR file lying around, or you are not certain the one you found belongs to the key currently on the token, export the certificate that is on the YubiKey and dump both files with certutil, which is built into Windows:
ykman piv certificates export 9a current-cert.pem
certutil -dump csr.csr
certutil -dump current-cert.pem
The easiest way to check the two match is to paste both dump outputs into an AI assistant and ask it to confirm whether the public keys are identical — it compares the hex far more reliably than reading it off the screen. If you would rather check by eye, these are the lines that matter:
Collecting and installing the renewed certificate
Once validation clears, you land on the CA's download page. Take everything before you navigate away — some resellers will not let you download a second time. Set the server platform to FIPS 140-2 Level 2 or Common Criteria EAL4+ and download that bundle. Then, from the file type dropdown, the option you actually need is Separate primary and intermediate .crt files (zipped) — that gives you the end-entity certificate and the intermediate as two separate .crt files, which is exactly what the steps below use. For your archive, also take A single .pem file containing all the certs and the P7B bundle. The three Download links further down the page give you the same certificates individually if you prefer. Store the lot with your csr.csr.
Rename your company certificate to issued_cert.crt and import it to the token exactly as in Section 4:
ykman piv certificates import 9a issued_cert.crt
Confirm the new certificate binds to the key on your token
If you renewed against your original CSR, verify that the CA honoured that key rather than issuing against something else. Dump the file you just imported:
certutil -dump issued_cert.crt
The Public Key hex block and the Key Id Hash must be identical to the ones in your CSR dump. If they are not, the import will still appear to succeed, but every signing attempt will fail with 0x80090016 — Windows would be holding a certificate whose private key is not on the token. Catch it here rather than halfway through a release.
Then clear the old certificate out of certmgr.msc under Personal > Certificates, eject the YubiKey, wait 10 seconds and re-insert it. Run certutil -user -store My to read the new Cert Hash(sha1) — this changes with every renewal even when the private key does not, so update it anywhere it is hardcoded in build scripts or CI pipelines. Sign a throwaway executable and confirm with signtool verify /pa /v before you sign anything you intend to ship.
Renewal notes and troubleshooting from practice
These notes come from renewing the certificate on one of our own tokens. They do not replace the steps above — they are the snags that cost time on the day, and the checks that avoid them.
-
Check the new certificate matches the key on the token, even without the CSR
The Public Key and Key Id Hash comparison against the original CSR is definitive, but a year on you may not have that CSR to hand. Before you import anything and overwrite the certificate currently in the slot, export it with
ykman piv certificates export 9a old.crt, dump both it and the new certificate withcertutil -dump, and compare the Public Key blocks. If they differ, the new certificate was issued against a different key and importing it will leave you unable to sign. Stop and re-check the order — it has to have been placed as Install on Existing HSM with the original CSR. -
Import the single leaf certificate, not the bundle
Some portals — DigiCert CertCentral among them — hand you a combined
.cer, or an "Individual .crts (zipped)" download, that is actually a certificate chain in PKCS#7 form.ykman piv certificates importcan choke on that, and the tell-tale sign is a "Cannot find the original signer" message when a tool tries to read the file. Open it in a text editor and take only the first-----BEGIN CERTIFICATE-----to-----END CERTIFICATE-----block, which is your company certificate — not the intermediate or the root. Save that block on its own asissued_cert.pemand import that file instead. -
0x8010006A means you missed the touch, not the PIN
If signing fails with
SignerSign() failedand0x8010006A, you almost certainly did not tap the key in the short window after entering the PIN. Re-run the command and, the moment the light blinks, touch the gold contact. Expect this on every file — and in practice a fresh PIN prompt with each signtool run — so a multi-file build with several executables plus the installer and uninstaller will prompt several times over. -
Signing has to be interactive
Because it needs the PIN dialog and a physical touch, signing cannot run unattended. It will not work from a Windows service, a CI runner, or a non-interactive or remote shell: the smart-card prompt never appears and you get
0x8010006A. Run it from a normal desktop terminal on the machine the key is plugged into. -
Clear out the old certificate once the new one verifies
When
signtool verify /pa /vpasses, make sure the previous or expired certificates are gone from Personal > Certificates incertmgr.mscso signtool cannot pick up a stale one, and always pin the exact certificate with/sha1and its thumbprint rather than leaving the choice to signtool.
8. SmartScreen Reputation, and What Renewal Costs You
A valid signature is not the same thing as being trusted. Microsoft Defender SmartScreen adds a second layer above cryptographic validity, and renewing your certificate resets a large part of it. This catches almost every publisher out at least once, so it is worth understanding before you renew rather than after.
How reputation is actually scored
SmartScreen accumulates trust against two separate things, and you need to keep them straight:
Two changes in recent years make this more painful than it used to be. Microsoft removed the Extended Validation fast path in 2024, so EV certificates no longer grant immediate reputation and EV-signed files build trust exactly like standard OV/CS-signed ones. And because the CA/Browser Forum has required code signing keys to live on certified hardware since June 2023, a renewal almost always means new key material as well as a new certificate.
How long it takes
There is no published figure, because the clock is driven by download volume rather than elapsed time. Widely distributed software can clear in days; a low-volume utility can sit behind a warning for a very long time. There is also no publisher portal where you can check your current standing, and no supported way to skip the rebuilding phase. Plan on the basis that you cannot predict it.
Reducing the damage
Submitting a file to Microsoft for review
If your signed file is being flagged, you can put it in front of Microsoft's analysts through the Microsoft Security Intelligence portal. Be clear about what this channel is: it is a detection dispute process, not a reputation reset button. It is the right route when a warning is wrong, and it is worth doing, but it does not grant reputation you have not yet earned.
-
Open the portal and sign in
Go to microsoft.com/en-us/wdsi/filesubmission and sign in with a Microsoft account on your own company domain, not a personal one. The submission is tied to that identity and updates are emailed to it.
-
Choose "Software developer"
Under "Submit file as a" you get three tiles — Home customer, Enterprise customer and Software developer. Pick Software developer ("Software providers wanting to validate detection of their products") and click Continue. You can jump straight there with
?persona=SoftwareDeveloperappended to the URL. -
Fill in the submission details
Check the notification email address is right, and add any colleagues who should see the case in the additional users box, separated by semicolons. Under "Select the Microsoft security product used to scan the file", choose the entry matching where the warning appeared — the SmartScreen option if it is offered, otherwise the Defender Antivirus or Edge entry. Company Name should match the organisation name on your certificate exactly. Leave the support case number as No unless you already have one open with Microsoft.
-
Attach the specific binary
Submit only the exact signed file that is being flagged — not your full installer bundle and not an archive containing dozens of files, as Microsoft explicitly deprioritises those. The limit is 500 MB, and if you need to zip it, encrypt the archive with the password
infected. Leave the retention question set to "No — remove the file automatically after a period of inactivity". -
Classify it as an incorrect detection
Under "What do you believe this file is?", choose Incorrectly detected as malware/malicious. The Detection name field is required, which is awkward for a pure SmartScreen prompt where no detection name exists — enter the exact wording of the warning you are seeing (for example the "Windows protected your PC" unrecognised app message), or the detection name from Defender's Protection History if there is one. Definition version is optional and comes from Virus & threat protection updates.
-
Make the Additional information field count
This is the part analysts actually read, and it must be in English. State that you are the publisher; give the product name and version, the official download URL, and the certificate details (issuing CA, the organisation name in the subject, and the SHA1 thumbprint). Say that the binary is signed on FIPS-validated hardware and timestamped. If this followed a certificate renewal, say so explicitly and give the old thumbprint too — it establishes continuity of publisher identity. Mention independent scan results if they are clean.
-
Submit and track it
Click Continue to submit, then follow the case under the Submissions menu. Set your expectations realistically: developers routinely report cases sitting "in progress" for weeks, and some are closed without explanation. Resubmitting with better evidence is usually more productive than waiting.
Best Practices & Alternatives
- Timestamping: Always use the
/trflag. This ensures the signature remains valid even after the certificate itself expires. - Remote Desktop (RDP): You cannot sign code over a standard RDP session due to smart card redirection security; you must be physically present at the machine.
- Azure Trusted Signing: For a cloud-based alternative, Azure offers a managed service for ~$10/month. However, it requires a 3-year verifiable business history and a more complex initial setup.
Verifying the Signature
This is really important. To ensure the signature is applied correctly, right-click your .exe > Properties > Digital Signatures. Select the signer and click Details. It should state: "This digital signature is OK."
If it does not specifically say this, then there is a problem — and even if you think it's working, it will never be authorised by Microsoft as secure.
Alternatively, use the CLI:
PowerShell/CMD
signtool verify /pa /v your_application.exe
Need code signing set up properly?
We configure FIPS-validated signing on hardware tokens and keep the renewals on track.